The McKenzie Baby Bump

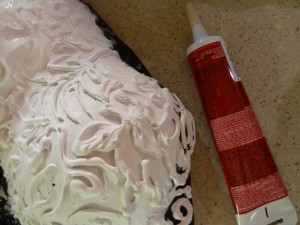
I didn’t get back to the project until late in the day yesterday as an invite to lunch could not be turned down! The next step was to added the surface design. I considered using white glue and decided it would take too long to dry. I considered getting ‘stringing compound’ and decided it would be too expensive. So in the end I chose to use my old standby, quick drying and paintable, DAP. I had part of a tube on hand so did a sample and although I would have preferred a finer line, decided it would work and made a trip to CT to get some additional tubes.
I spent a couple of hours drawing squiggles and finished just in time to respond to a invitation to have dinner with my new granddaughter! The result had to dry overnight anyway so it was great timing! The weather here is changeable and they are forecasting thunderstorms for later today, so I have plowed ahead with this ‘work of art’.

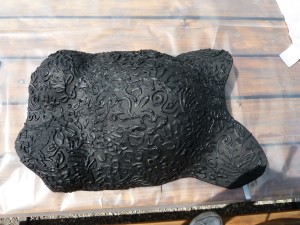
Before leaving for my Monday morning art group, I painted the surface with black gesso. I wanted a black surface for the background color. I chose black gesso as it would seal the plaster so that it will not absorb paint and would allow the paint to retain it’s gloss.

After painting I realized there were a couple of areas where the design was ‘flat’ – the result of trying to get that last bit of Dap out of the tube! So a bit of repair work was done with the hope that it would be dry enough to paint by noon. Before lunch I repainted the area where repairs were made and after lunch the fun began.

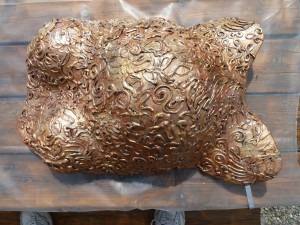
I blotch painted areas in burnt sienna, ochre and a grayed yellow. The weather at the time was warm and sunny and the humidity low so it dried quickly. I added a layer of spray fixative at this point. The next layer was to blotch rub some gold and silver into the design. Again a layer of fixative.

The final layer was an all over rub with bright copper. The result was close to the concept requested and I think they will be pleased.
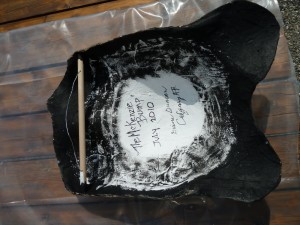
 I promised to show the mounting. After the last post and before starting the surface design, with DH’s assistance, a dowel was cut and two screwnails used to fasten it inside the body cast. Two holes were drilled through the dowel and threaded with picture wire stretched so that it would not show above the top of the piece. To finish off I will note where the cast touches the table and apply some dap so that the paint will not rub and mark the wall. All done.
This is a great idea! I love what you're doing so far. (I saw your post on quiltart.)
I love this Diane! It's just beautiful. What a personal and funky reminder of a beautiful time of life. Why use fixative between layers?
Again, wonderful job. (What's DAP?)
Marion